为什么需要开发拓展?
App Inventor 2 是积木式在线安卓开发环境,利用拖拽式的方式实现代码块堆叠,从而完成相应的逻辑。
上手很容易,但是由于代码块提供的功能有限,使用比较单一,在开发上有很大的局限性,但是它提供了拓展Extension特性,开放了源码,使得开发者可以根据自己的需要,自定义开发原生组件实现不了的、更加强大的功能。
一般拓展采用java/kotlin语言进行开发,由于拓展开发相当于直接使用安卓原生开发语言开发安卓相关功能,因此理论上拓展可以实现任何的安卓功能。
注意:java/kotlin写出来的拓展只能运行于安卓设备上,对于iOS设备需要使用swift开发iOS版本的拓展。
环境配置
-
安装好 Java开发环境 以及 Ant编译环境,这里以Windows为例,供参考:
安装完JDK后配置环境变量 计算机(右键)→属性→高级系统设置→高级→环境变量
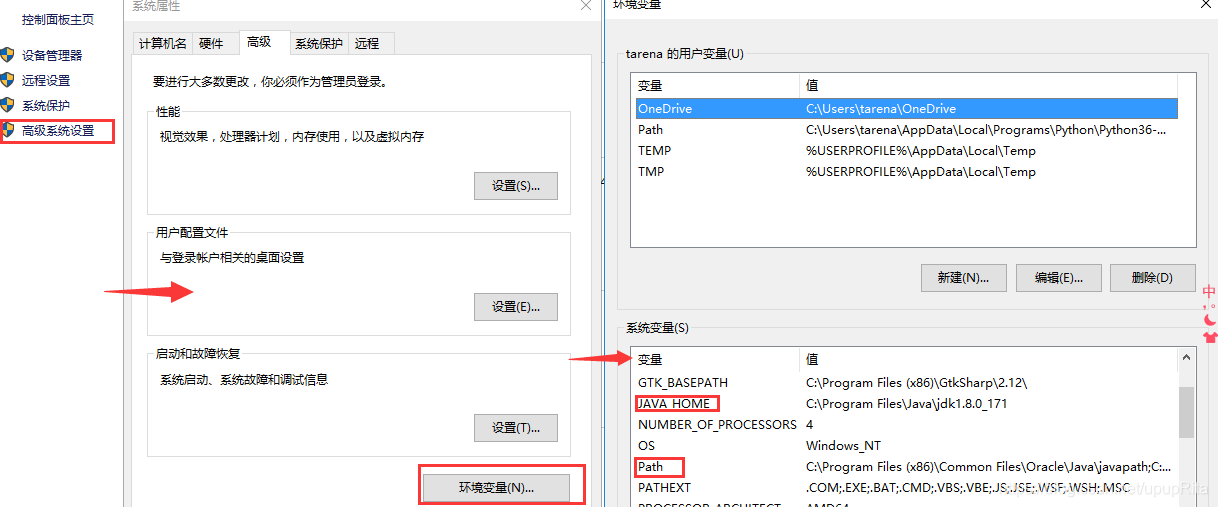
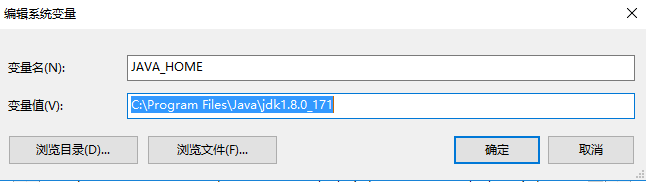
新建JAVA_HOME:如果是默认安装路径那么就在这个路径下:C:\Program Files\Java\jdk1.8.0_171
新建Classpath:
.;%JAVA_HOME%\lib;%JAVA_HOME%\lib\tools.jar在Path后面新增:
%JAVA_HOME%\bin;%JAVA_HOME%\jre\bin;注意:如果之前的path末尾没有;要手动加上配置完成后点击确定;cmd打开命令行,
java -version,显示java jdk的版本,配置成功
-
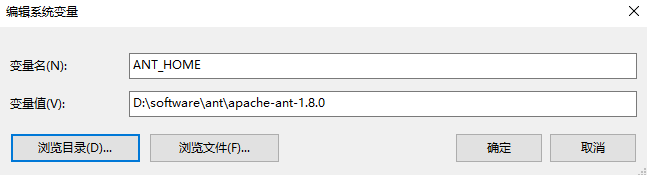
配置ant:ant用来将你的写完的自定义的Extension打包成aix文件,打包完成以后可以直接导入到app inventor中使用
ANT_HOME 存放你ant的目录
 path           ; %ANT_HOME%\bin;
 classpath      ; %ANT_HOME%\lib;
验证:cmd 命令行输入ant命令

出现以上结果证明配置成功。
源码下载
https://github.com/mit-cml/appinventor-sources
国内下载非常非常缓慢,这个项目比较大,也许2天都下载不完,不过没关系,我们早已提供已下载好的工程源码,关注页面底部公众号(或搜索“fun123cn”关注),回复“源码”即可免费下载。
代码编写
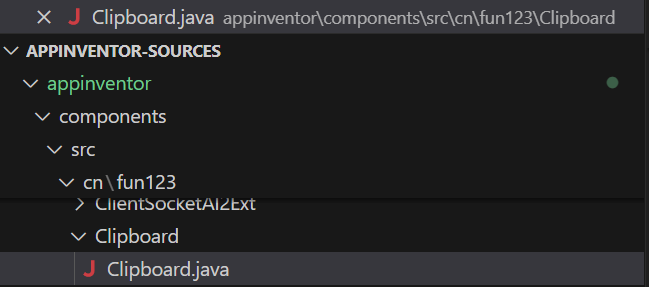
采用自己较为熟悉的java开发环境就行,这里推荐使用VSCode,拓展目录在 appinventor-sources/appinventor/components ,测试代码参考如下:
演示版的完整代码(可编译运行)如下:
package cn.fun123.Clipboard;

import android.content.Context;
import android.util.Log;
import android.widget.Toast;
import android.content.ClipData;
import android.content.ClipboardManager;
import android.content.Intent;
import android.content.res.AssetFileDescriptor;
import android.net.Uri;

import com.google.appinventor.components.annotations.DesignerComponent;
import com.google.appinventor.components.annotations.DesignerProperty;
import com.google.appinventor.components.annotations.PropertyCategory;
import com.google.appinventor.components.annotations.SimpleFunction;
import com.google.appinventor.components.annotations.SimpleObject;
import com.google.appinventor.components.annotations.SimpleProperty;
import com.google.appinventor.components.common.ComponentCategory;
import com.google.appinventor.components.common.PropertyTypeConstants;
import com.google.appinventor.components.runtime.*;

import java.io.FileInputStream;
import java.io.FileNotFoundException;
import java.io.IOException;
import java.io.InputStreamReader;

@DesignerComponent(version = Clipboard.VERSION,
    description = "App Inventor 2 剪贴板管理拓展。Powered by 中文网(www.fun123.cn)",
    helpUrl = "https://www.fun123.cn/reference/extensions/",       //点“帮助”跳转的页面
    category = ComponentCategory.EXTENSION,
    nonVisible = true,                                             //非可视拓展
    iconName = "aiwebres/small-icon.png")                          //拓展的图标,可以使用相对路径
@SimpleObject(external = true)
@SuppressWarnings("deprecation")
@UsesPermissions(permissionNames = "android.permission.INTERNET")  //拓展需要请求的权限,这里仅展示用
@UsesPermissions({INTERNET})                                       //简洁写法,等同于上面一行
@UsesLibraries(libraries = "okhttp-3.12.13.jar, xxx.jar")          //依赖第三方jar库的,多个英文逗号分隔

public class Clipboard extends AndroidNonvisibleComponent implements Component {

  public static final int VERSION = 1;
  private ComponentContainer container;
  private Context context;
  private static final String LOG_TAG = "CB";
  private boolean suppressToast;


  public Clipboard(ComponentContainer container) {
    super(container.$form());
    this.container = container;
    context = (Context) container.$context();
    Log.d(LOG_TAG, "Clipboard Created");
  }


  @SimpleProperty(category = PropertyCategory.BEHAVIOR,
      description = "操作成功后不显示提示信息,默认 false。")
  public boolean SuppressToast() {
    return suppressToast;
  }


  @DesignerProperty(editorType = PropertyTypeConstants.PROPERTY_TYPE_BOOLEAN,
      defaultValue = "false")
  @SimpleProperty
  public void SuppressToast(boolean suppressToast) {
    this.suppressToast = suppressToast;
  }


  @SimpleFunction(description = "拷贝文本至剪贴板,如果 SuppressToast 是 true,则拷贝完成后不会显示'文本已拷贝'的提示信息。")
  public void Copy(String text) {
    try {
      //演示用,代码省略...
      Log.d(LOG_TAG, "文本已拷贝: " + text);
    } catch (Exception e) {
      Log.e(LOG_TAG, e.getMessage(), e);
    }
  }

  @SimpleFunction(description = "从剪贴板粘贴文本,如果 SuppressToast 是 true,则粘贴完成后不会显示'文本已粘贴'的提示信息。")
  public String Paste() {
    //演示用,代码省略...
    Log.d(LOG_TAG, "文本已粘贴!");
    return "";
  }
}
请注意:拓展的图标设置 iconName = "aiwebres/xxx.png",图片名任意,但是相对目录 `aiwebres` 必须是这个名字,不能更改!!否则会无法正常展示图标。
如果拓展中需要请求相关权限,可以在代码中进行申明,有两种方式:
@UsesPermissions(permissionNames = "android.permission.INTERNET")  //拓展需要请求的权限,这里仅展示用
@UsesPermissions({INTERNET})                                       //简洁写法,等同于上面一行
如果拓展用到了第三方库,也可以进行申明:
@UsesLibraries(libraries = "okhttp-3.12.13.jar, xxx.jar") //依赖第三方jar库的,多个英文逗号分隔
相应的 jar 库要放到 appinventor-sources\appinventor\lib 目录下,修改编译配置文件 appinventor-sources\appinventor\components\build.xml :
配置文件中搜索 <target name="CopyComponentLibraries",尾部加上库拷贝:
<copy toFile="${public.deps.dir}/xxx.jar" file="${lib.dir}/xxx.jar" />
拓展编译
进入目录:appinventor-sources/appinventor,执行如下命令:
ant extensions
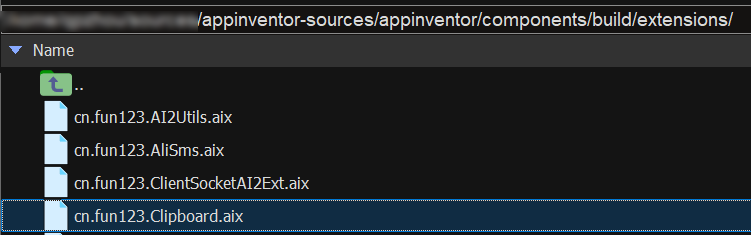
编译成功后,.aix拓展在 appinventor-sources/appinventor/components/build/extensions/ 目录下:
拓展导入,测试验证

基本的流程大致就是这样的了,如果要开发更为复杂的高级拓展,可以参考源码中官方提供的样例,多研究、多测试一定能够搞得定的,加油~
如果在编译或开发过程中遇到任何问题,欢迎来社区发帖讨论。
 扫码添加客服咨询
