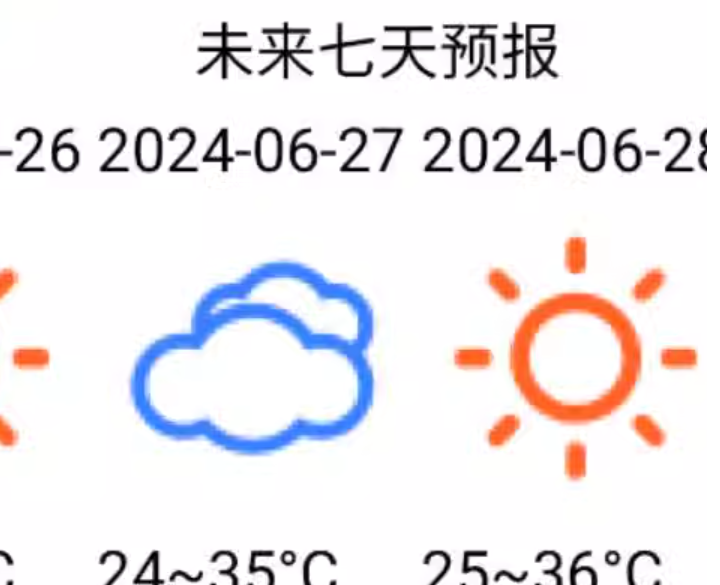
App效果图,展示未来7日的天气预报,包括日期、天气图示和温度:
App原理介绍
通过调用第三方天气api,填入必要的参数,通过Web客户端请求url。返回json格式的数据结果,使用AppInventor2解析json结果,显示到App上即可。
第三方天气API介绍
第三方天气的api平台特别多,这里仅以“和风天气”(dev.qweather.com)作为演示,其他平台的使用方法都是几乎一样的。
平台的注册及登录步骤请自行完成,登录后需要创建一个项目以获得API调用时必要的用户认证key。
创建一个项目

填写必要的参数
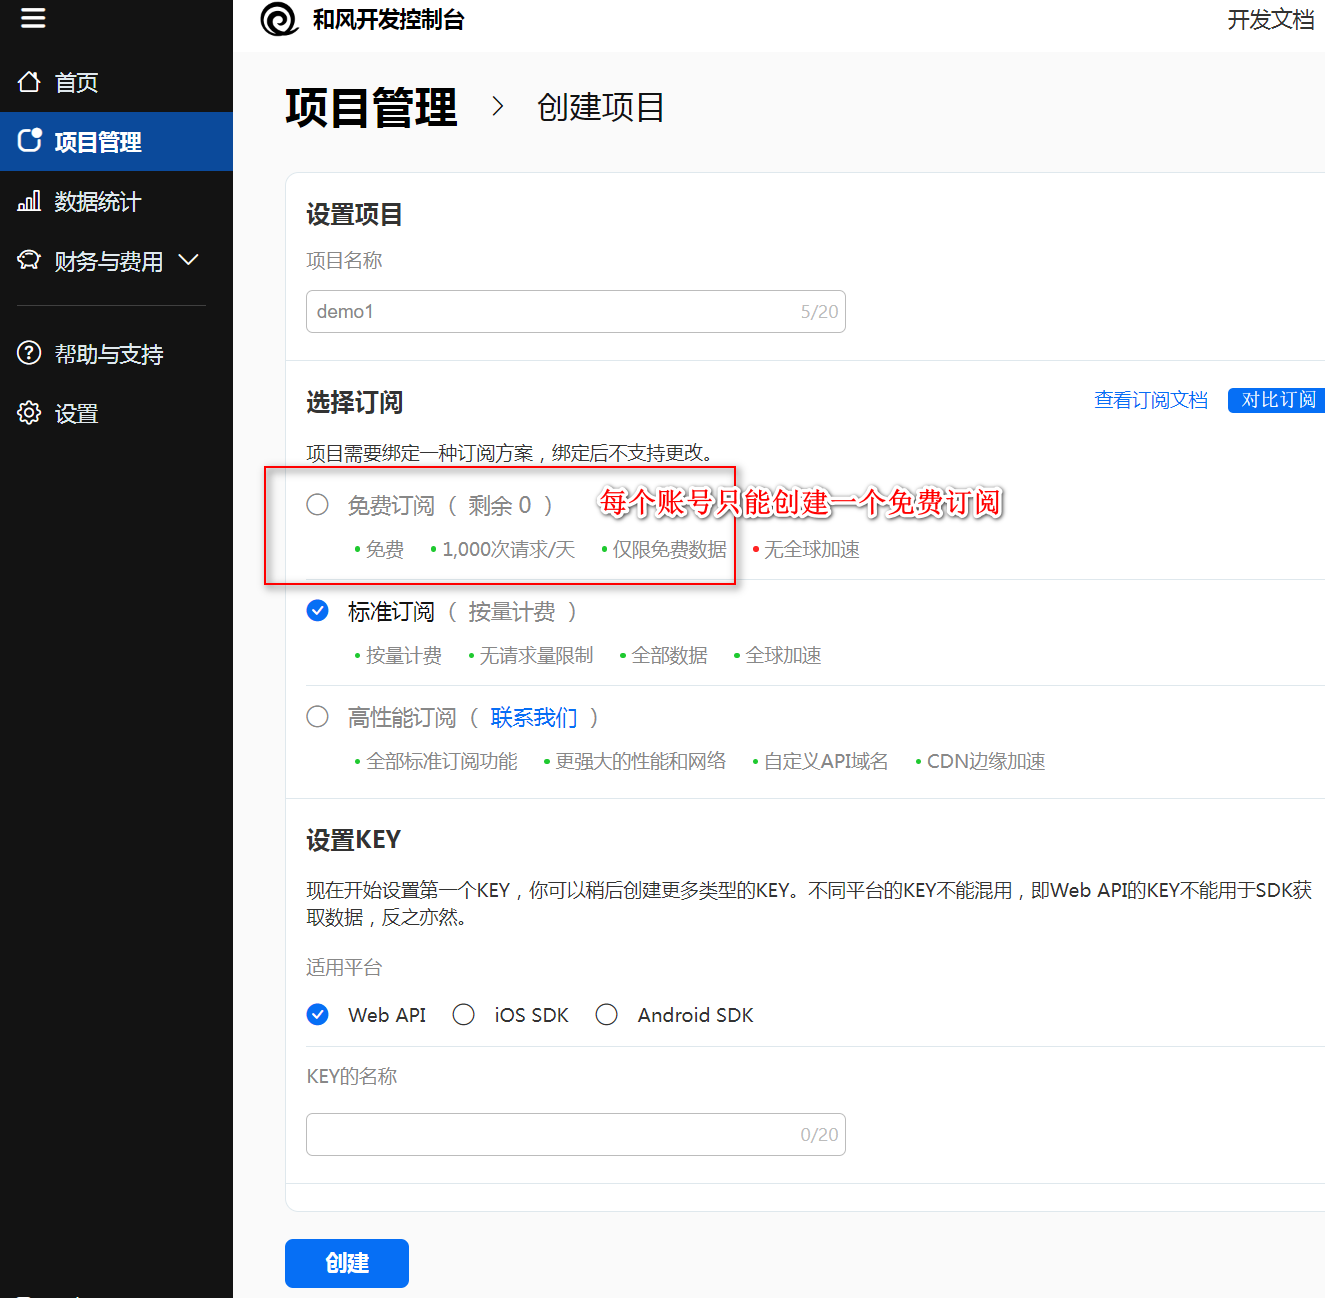
查看已创建的项目
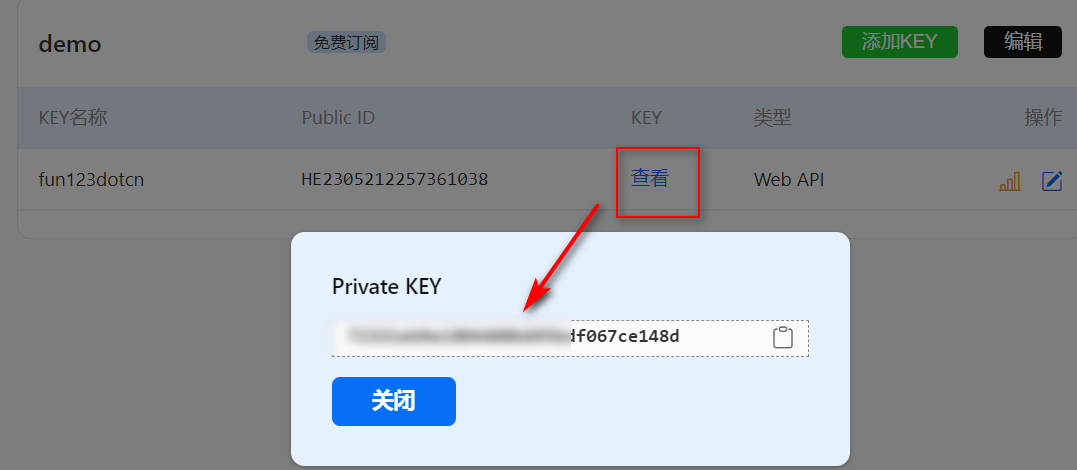
这时,我们就能得到了用户认证key,后续步骤会用到这个关键的数据。
查看API文档,确定我们需要准备的数据
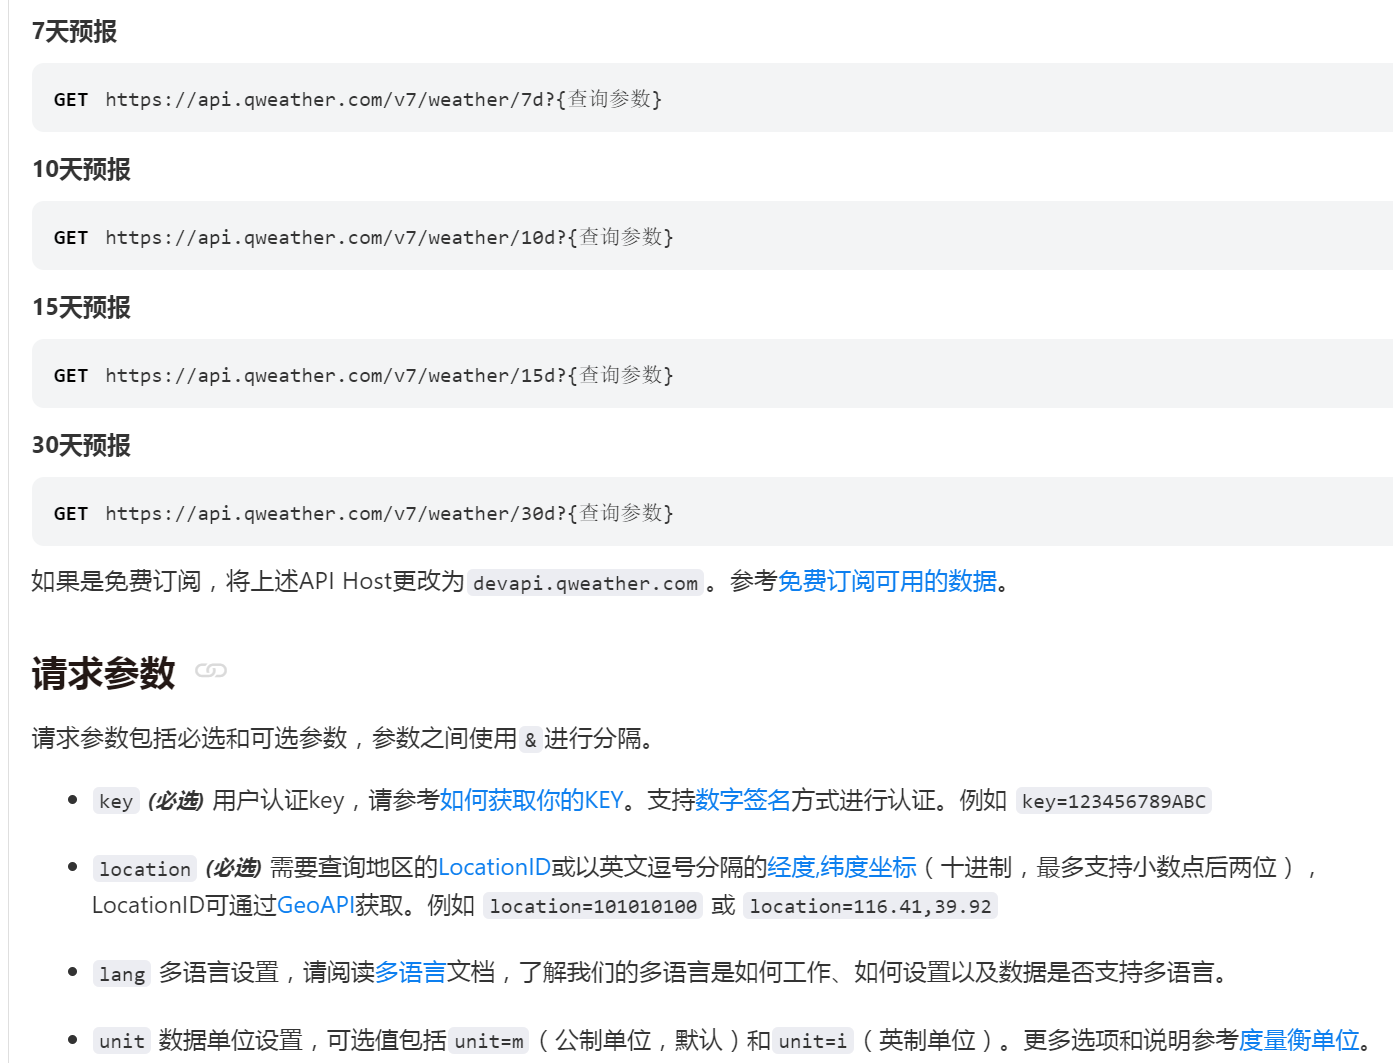
通过文档可知,我们需要在url中替换填入自己的key。
请求示例:北京7天预报
curl -L -X GET --compressed 'https://api.qweather.com/v7/weather/7d?location=101010100&key=YOUR_KEY'
第三方API的调用
使用”Web客户端“组件调用第三方API,代码如下:

JSON结果的解析
请求成功返回JSON示例
{
  "code": "200",
  "updateTime": "2021-11-15T16:35+08:00",
  "fxLink": "http://hfx.link/2ax1",
  "daily": [
    {
      "fxDate": "2021-11-15",
      "sunrise": "06:58",
      "sunset": "16:59",
      "moonrise": "15:16",
      "moonset": "03:40",
      "moonPhase": "盈凸月",
      "moonPhaseIcon": "803",
      "tempMax": "12",
      "tempMin": "-1",
      "iconDay": "101",
      "textDay": "多云",
      "iconNight": "150",
      "textNight": "晴",
      "wind360Day": "45",
      "windDirDay": "东北风",
      "windScaleDay": "1-2",
      "windSpeedDay": "3",
      "wind360Night": "0",
      "windDirNight": "北风",
      "windScaleNight": "1-2",
      "windSpeedNight": "3",
      "humidity": "65",
      "precip": "0.0",
      "pressure": "1020",
      "vis": "25",
      "cloud": "4",
      "uvIndex": "3"
    },
    {
      "fxDate": "2021-11-16",
      "sunrise": "07:00",
      "sunset": "16:58",
      "moonrise": "15:38",
      "moonset": "04:40",
      "moonPhase": "盈凸月",
      "moonPhaseIcon": "803",
      "tempMax": "13",
      "tempMin": "0",
      "iconDay": "100",
      "textDay": "晴",
      "iconNight": "101",
      "textNight": "多云",
      "wind360Day": "225",
      "windDirDay": "西南风",
      "windScaleDay": "1-2",
      "windSpeedDay": "3",
      "wind360Night": "225",
      "windDirNight": "西南风",
      "windScaleNight": "1-2",
      "windSpeedNight": "3",
      "humidity": "74",
      "precip": "0.0",
      "pressure": "1016",
      "vis": "25",
      "cloud": "1",
      "uvIndex": "3"
    },
    {
      "fxDate": "2021-11-17",
      "sunrise": "07:01",
      "sunset": "16:57",
      "moonrise": "16:01",
      "moonset": "05:41",
      "moonPhase": "盈凸月",
      "moonPhaseIcon": "803",
      "tempMax": "13",
      "tempMin": "0",
      "iconDay": "100",
      "textDay": "晴",
      "iconNight": "150",
      "textNight": "晴",
      "wind360Day": "225",
      "windDirDay": "西南风",
      "windScaleDay": "1-2",
      "windSpeedDay": "3",
      "wind360Night": "225",
      "windDirNight": "西南风",
      "windScaleNight": "1-2",
      "windSpeedNight": "3",
      "humidity": "56",
      "precip": "0.0",
      "pressure": "1009",
      "vis": "25",
      "cloud": "0",
      "uvIndex": "3"
    }
  ],
  "refer": {
    "sources": [
      "QWeather",
      "NMC",
      "ECMWF"
    ],
    "license": [
      "QWeather Developers License"
    ]
  }
}
JSON解析参考代码

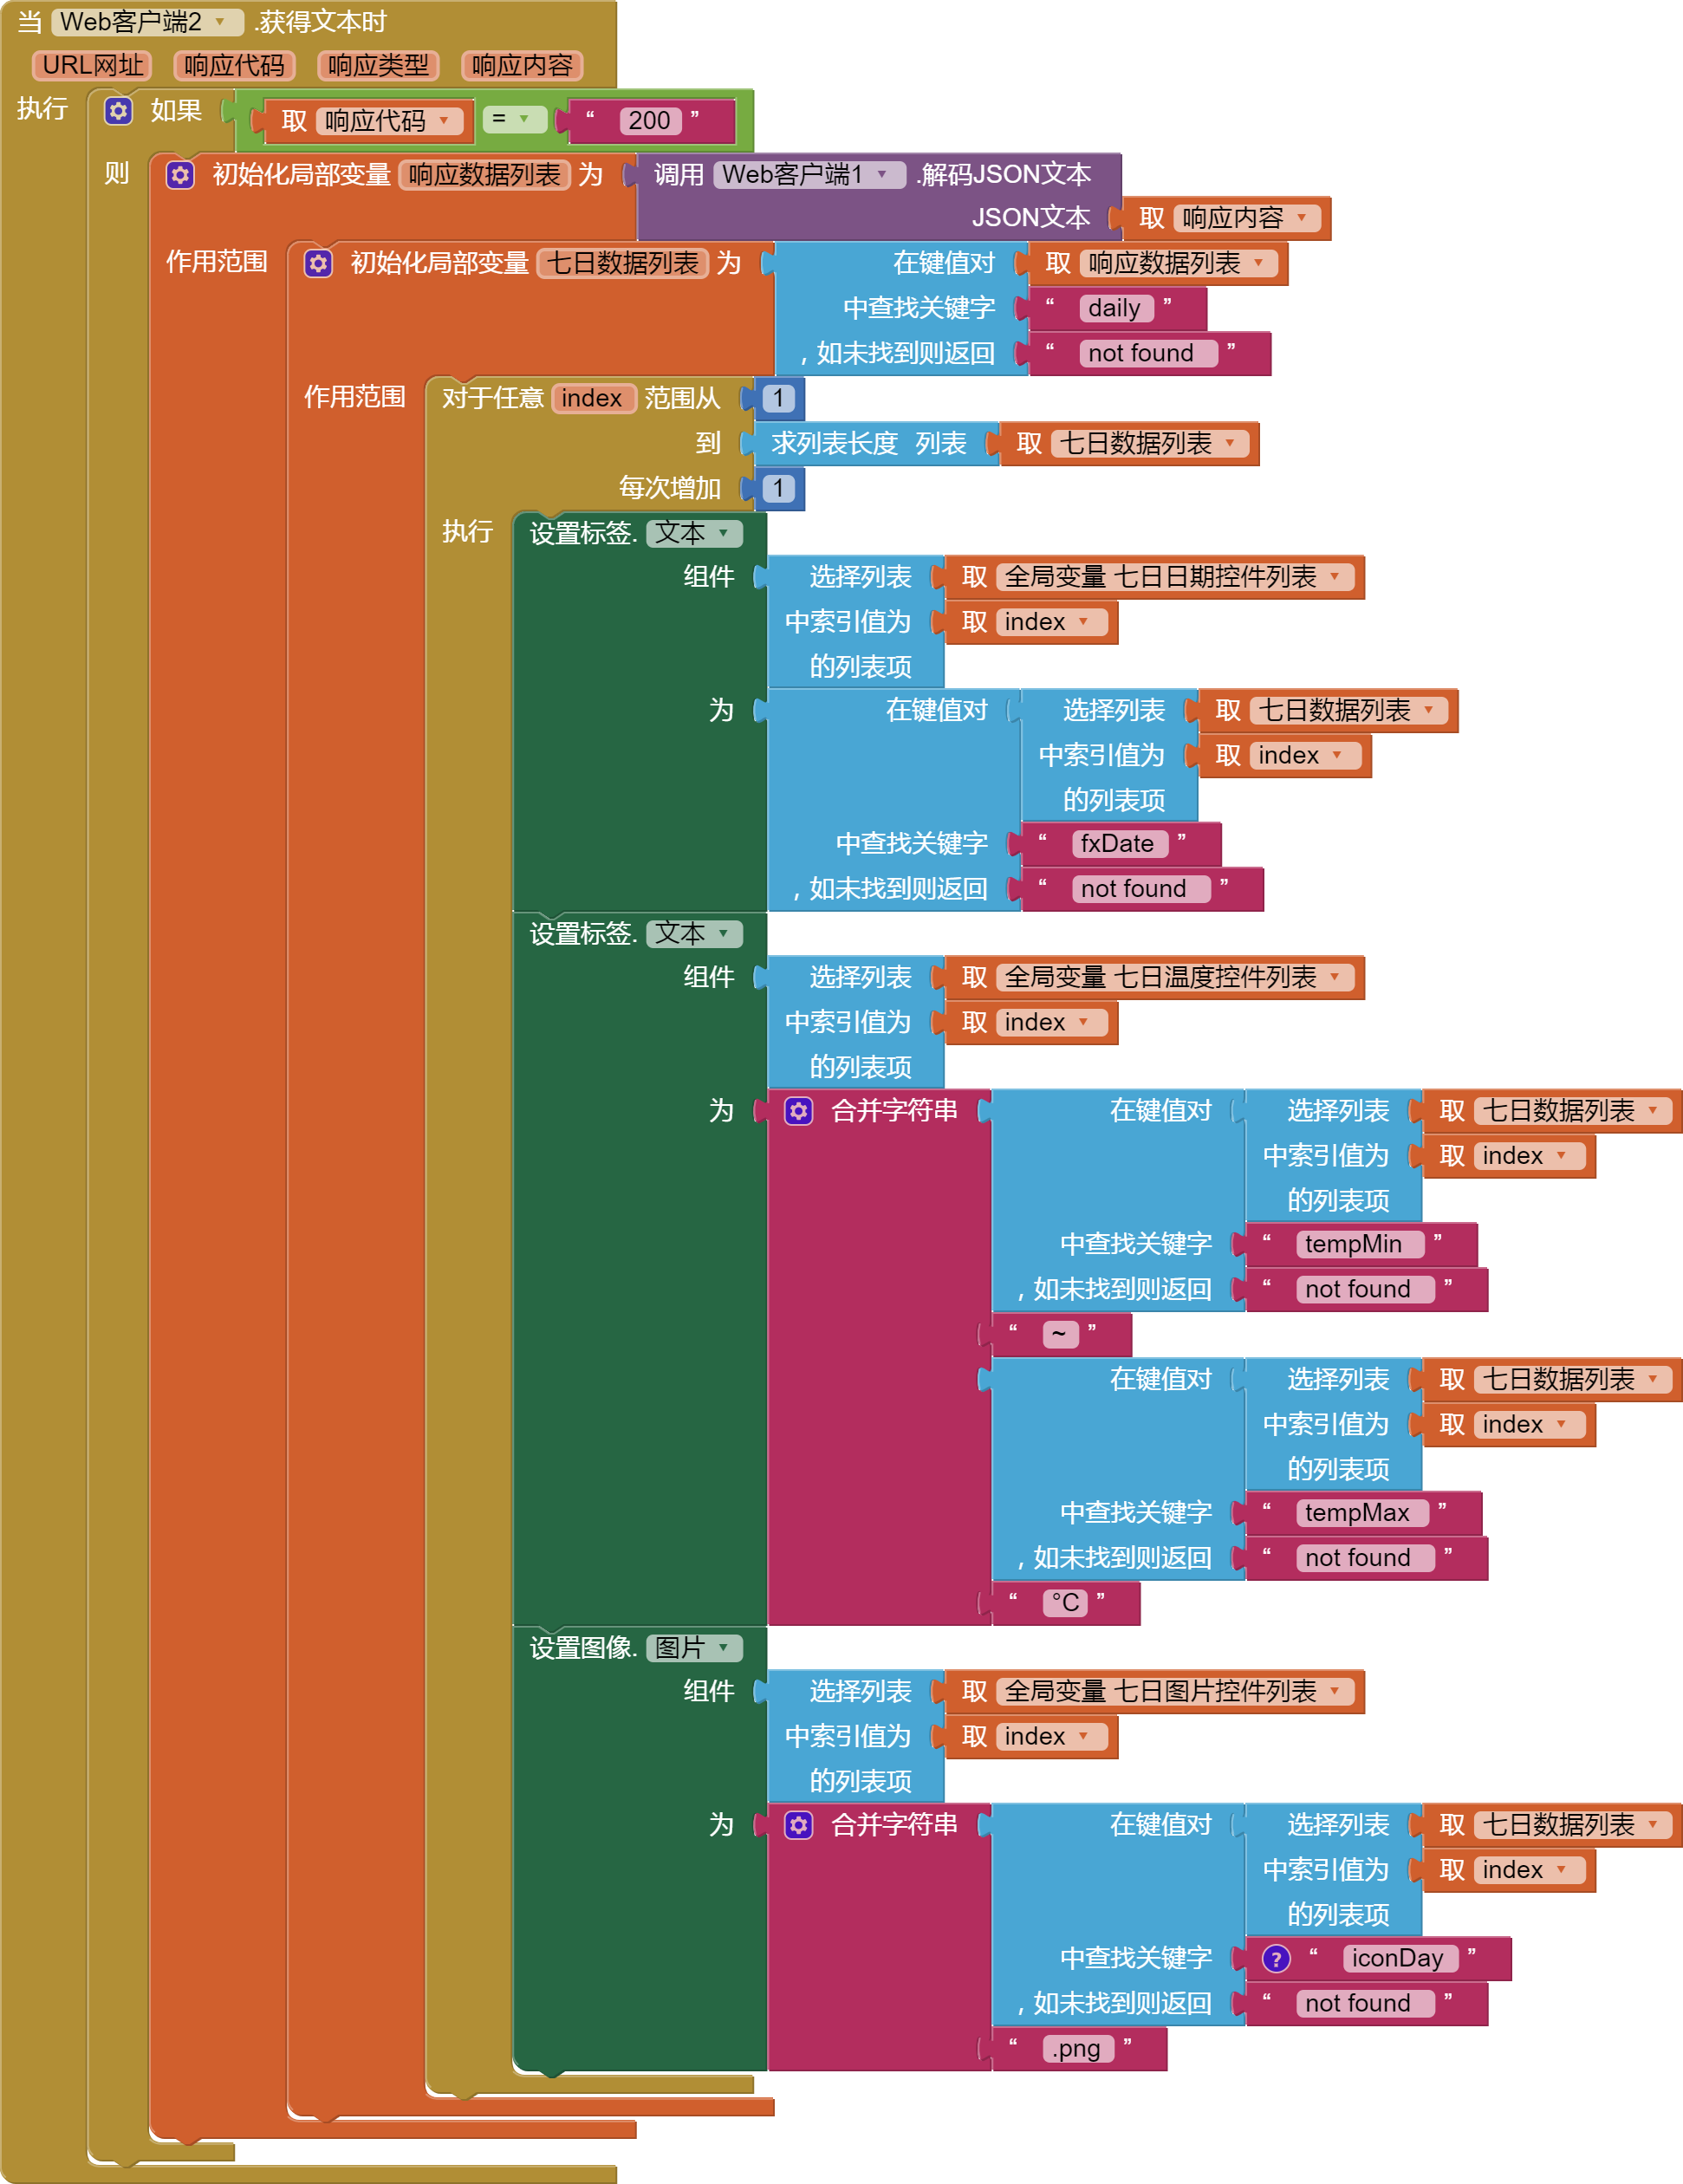
aia源码
通过上面的步骤拆解及代码块参考,相信你一定能够完成基本功能的开发,这里不直接提供免费源码,提倡自己动手实操!
点此自助购买 以上演示的aia源码。
 扫码添加客服咨询
